Thursday, 26 September 2013

Secrets of the Ranger - The Tree-Tube Cutter

Every year, thousands of young trees are planted all across the country in lightweight plastic tubes which vary in height depending on the species being planted and what they need protecting from.  After a few years these tubes need removing but this can damage the tree, unless you have the secret weapon!

Why Use Them in the First Place?

There are a wide variety of tubes available; shorter ones measuring 18" high protect shrubs from rabbits or mice which may nibble at the soft bark and tubes up to 6ft high give the trees a fighting chance of growing tall without having their tops eaten off.

The tubes serve another purpose, which is to provide a micro-habitat for the tree as the air temperature inside will be slightly warmer and more humid than outside the tube. By protecting the very thin cambium of sapling trees from icy cold winds, the tubes are therefore ideal for use when planting in exposed locations.

Hundreds of native oak planted here on an exposed site have enjoyed the protection offered by simple plastic tubes


The Drawback from Using Tubes

The tubes are designed to split open and fall off the tree when it grows larger; some tubes come already perforated to allow for this.  However, in practice the tubes don't often fall off on their own and in fact can cause serious damage to a tree which has grown healthily for a few years.  So many people go to the effort of planting trees; yet I often see them looking quite sorry for themselves and at worst strangled by the tubes that once saved them as tiny whips.

As the tree grows it fills the gap inside the tube and this becomes a trap for debris such as dead leaves.  When the tree has nearly filled the tube this rotting debris will hold water like a sponge up against the outer surface of the tree and can cause it to rot.  When tubes are taken off at this point the tree is often covered in thick green algae! 

This guard has been on too long, moss and even an ants nest were found within!


The other problem is that trees are usually wider at the base than the top, so at a quick glance the tree can appear to have plenty of room for growth at the top. However, the base may have grown to completely fill the plastic tube which is now collecting rainwater as well as the usual plant debris.

The challenge when the trees get to this stage is to remove the plastic tube without causing damage to the soft outer bark of the saplings, but if the tubes are completely filled by the tree then how can we do this?  A regular knife will cut through the plastic and into the bark leaving a wound that will put the tree in danger of fungal infection.

The Secret Solution!

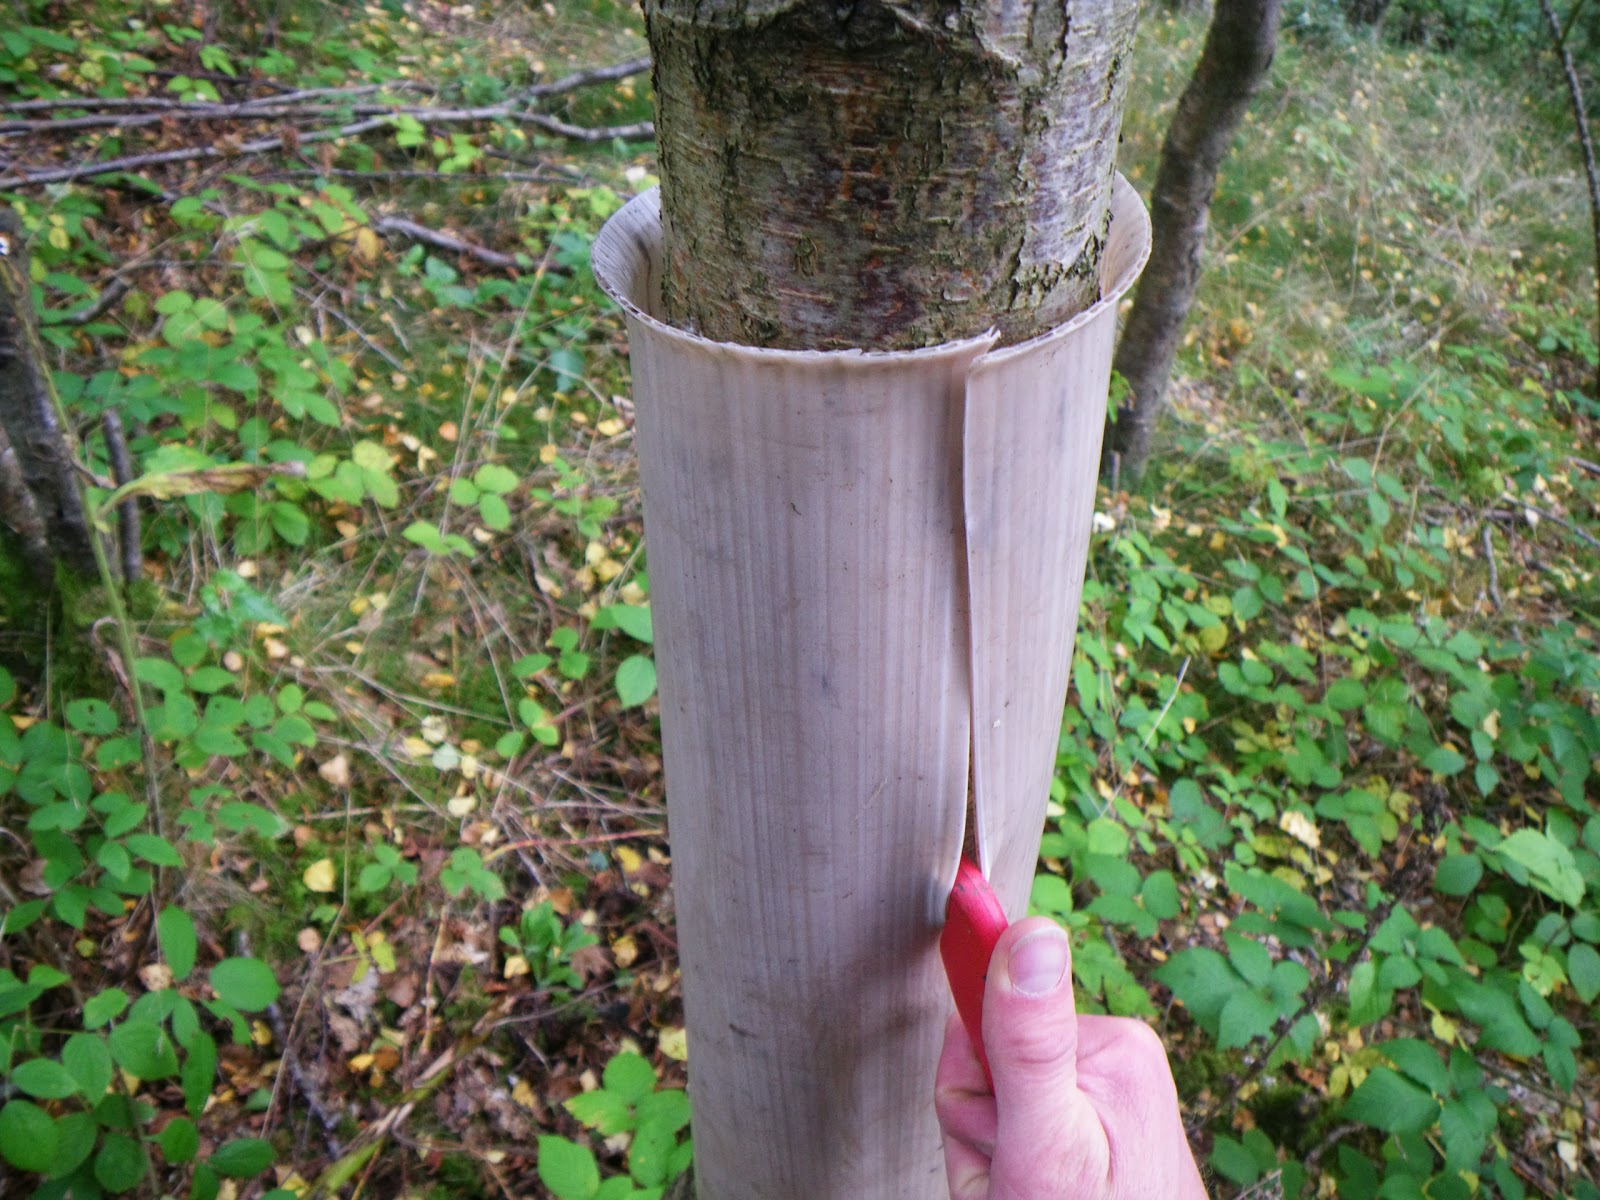
A simple hand tool used for opening cardboard boxes!  Many different types are available. The one I use has a metal blade that can be rotated and replaced as it gets worn or damaged.  The method is to simply start as the top and carefully slide the beak of the tool between the tree and the guard and the blade cuts the tube.  Sometimes it's difficult to get to the very bottom so I try and lift the plastic tube up the tree until I have enough room to continue cutting to the very bottom.  Once the tube has been cut all the way down, it's a simple case of detaching it from the supporting post and removing it from the woodland.

A plastic tool intended for opening boxes has another great use


Simple but effective.  Also safe for the tree and the operator!

Sometimes there is a need to cut the tube open but leave it on the tree.  When shedding antlers, deer will sometimes rub them on the young trees causing terrible damage.  The other advantage is that the tree has more room to sway in winds, giving it the need to put on better and stronger supporting roots, so when the guard is finally taken off the tree is less likely to flop to the floor!  From experience, using wider tubes meant for shrubs but placing one on top of another works best for individual open grown trees, as they have plenty of room, perhaps a little more light and yet are still well protected.

When planting hundreds of trees, there are usually a few that don't survive and leave empty tubes standing.  These can be re-used, if not in situ, then they can be taken away and used again when the next planting season comes around.

Look for tubes with a fluted top; this stops the tree from ring-barking itself on a sharp edge.


So if you've planted trees in tubes, please don't forget to check up on them regularly, as this may save them.

Ben Knipe
Woodland Ranger


Sunday, 22 September 2013

Queen Adelaide's Hill Benches.


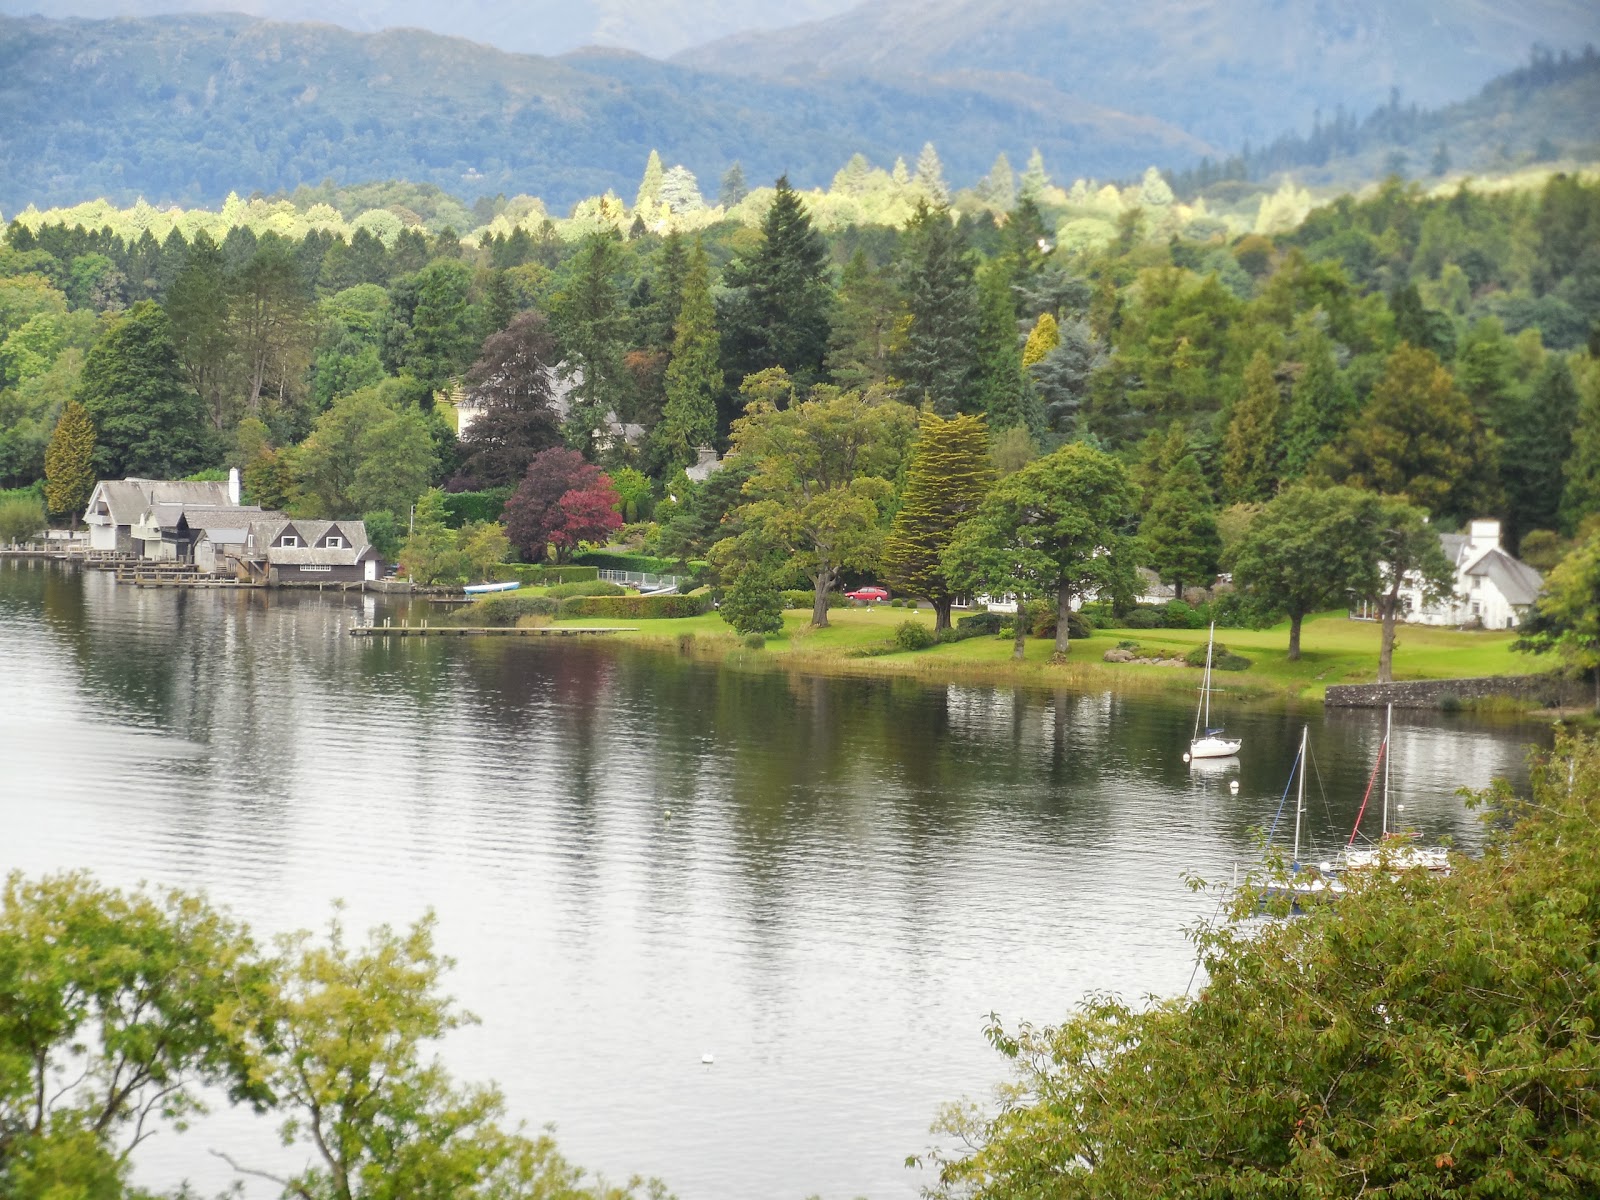
Adjacent to the A592, Queen Adelaide's Hill is an easily accessible vantage  point with wonderful views of Windermere. It is just a few minutes walk to the summit.

However the two old memorial oak benches overlooking the lake were ready for replacement.

The legs of these benches had started to rot.

The seating areas were also retaining rain water. It took a lot of warm sunshine to dry them out; so both the benches were wet for much of the time, and not really suitable for sitting on any longer!

Thanks are owed to the National Trust joiners. On request, they constructed two excellent new benches from Douglas Fir wood as replacements for the old benches.

The superb new benches on their way to Queen Adelaide's Hill
It can be seen how cracked and open the wood on the surface of the old bench  has become, allowing water to settle in the grooves rather than being shed from the seating area.

The old benches were prised out of the ground using a bar and brute force. This image shows how rotten the legs had become, especially in the region of the top soil
                                                 
Out with the old bench.....
The fencing mell or hammer came in useful.
                                                       .....and in with the new.                                                         
What a setting!
Curious spectators.
Enjoy the view, whilst retaining a dry posterior!  
The view to the North, taking in the Langdale Pikes.
The view towards the Southern end of the lake, taking in 
Belle Isle and Claife Heights.
This large wooded hillside to  the west is owned and managed by the National Trust, and contains many of our native tree varieties.
The views directly below the first bench.

The M.V Swan"hugging" the west shore of Windermere, over a mile away.
(Full telephoto)

The first visitors to sit down on the new benches and take in the views.
Even on a grey September afternoon, visitors still find the views special from Queen Adelaide's Hill.


Monday, 16 September 2013

Windermere Working Holiday Group


On Sunday 8th of September, a Working Holiday Group, combining estate work with photography, met up with the Windermere Rangers. The 4 days of work  consisted of  walling and footpath work at Common Wood. One day was set aside for photography with professional photographer, Dan Lane.

The perimeter wall for Common Wood was in a bad state of repair.

A large stretch needed to be taken down and rebuilt.

This was to prove quite a challenge as a lot of undergrowth had to be cut back on the "wooded" side of the wall before any work could commence.

The following images give an idea of the work involved.

A close up of the wall shows how bad its condition is.
Image courtesy of Dianne Lang, Working Holiday Leader
With Thanks to Dianne for the use of her excellent images in this post.
Clearing away the undergrowth and scrub to get at the wall was a big job in itself. Image courtesy of Dianne Lang.

With the section of wall taken down, now is the time to dig out and reposition the foundation stones. Image courtesy of Dianne Lang.
The repositioned foundation or footing stones, well dug in and ready for the  "infill', or  small  stones to  pack into the middle.  Filler or hearting are other names used for this. Insufficient filler will cause the wall to collapse in on itself, so it is important to keep the interior of the wall well filled!  
The "batter frames" with string lines attached determine the shape of the wall. Most drystone walls progressively narrow as they get higher.

A good perspective. The foundation stones are approx. 32" apart. The stones at the top of the wall approx: 20" apart. Image courtesy of Dianne Lang.
The top stones or cam stones being placed at an angle
 and butting up to the string line
The string line indicates the height of the top stones and hence the wall and allows for a neat finish
Nice looking job!
What a difference!
Digging out new drains. Image courtesy of Dianne Lang.
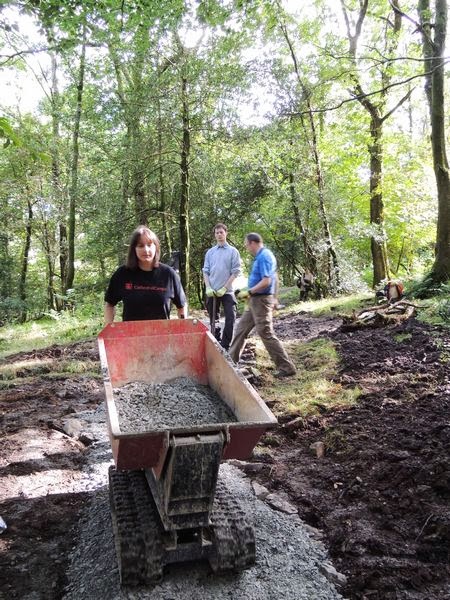
Nearly 5 tons of "M.O.T" stone was used to resurface sections of the path.
 Image courtesy of Dianne Lang.
Thank-you for the delicious egg and bacon butties.
Thanks to the Working Holiday Group for all their hard work and enthusiasm. Great Result!


Wednesday, 21 August 2013

Replacing the ladder stile at Glencoyne, above the old quarry.


The old ladder stile at Glencoyne Brow was in  a sorry state and in need of replacement.


Instead of a new ladder stile, putting in a new gate way through the wall was considered to be a better, and safer option.

A new gate would be far easier for dogs and their owners to negotiate!

It would involve a lot more work to install a new gate, but in the long run, well worthwhile.


Seen from the other side.....YES! It really is well past its sell by date.
The route to and from the old quarry is challenging, especially when carrying up tools and gate posts.
The View from the work site.
The wall in the process of being taken down to allow room for the new gateway.
Some of the "footing stones" or foundation stones needed to be removed.  2 bars needed for this one!
The gate post  has been dug into the ground and is firmly in place; the wall is being quoined up to it
Almost up to height.
Footing stone being "barred" in for the other side of the gateway
Almost done. This image gives some idea of the steepness of the slope we were working on.
Just a reminder of what was being replaced!


Thursday, 15 August 2013

Bees Please!

15 Things you might not know about bumblebees...


1. It is the female bumblebee that stings

2. Bumblebees can suffer from overheating on very warm sunny days

3. Bees have two pairs of wings whereas flies only have one pair

4. Unlike honey bees, bumblebee nests only last for one season (with exceptions)

5. Usually only the fertilized queens survive the winter

6. Tongue lengths differ a lot between species of bumblebee, depending on their favourite flower

7. If their tongue is too short for a plant, they can bite a hole in the corolla and commit 'nectar robbery'!

8. To make a memory map of the landscape a bee will first fly in ever widening circles away from the nest

9. To tell other bumblebees about a new food source, they will run around the top of the nest buzzing their
wings and bumping into others.  A less romantic version of the waggle dance done by honey bees!

10. 3 species of bumblebee have become extinct in Britain

11. Several species were introduced to New Zealand from Britain where they still survive

12. Some species are called cuckoo bumblebees because they will get workers from the nests of other species to raise their young

13. Bumblebees have many lookalikes including flower bees, hover flies, the warble fly and the bee fly

14. There are 239 species of bumblebees in the world (Williams 1998)

15. Central Asia has the richest populations of bumblebees

Source: Bumblebees by Ted Benton, Collins New Naturalist series, ISBN 0-00-717450-0

Bees in our Toilet

Last month a colony of bees decided to make a nest in a cavity under the roof of our outside toilet block here at our office in Windermere.  On closer inspection it turned out that these were no ordinary bees but were tree bumblebees (Bombus hypnorum) which were first seen in the UK in 2001 and have become naturalised.  What made this sighting even more interesting was the fact it was only the 2nd tree bumblebee nest seen in the Lake District this year!
A tree bumblebee (Bombus hypnorum) seen outside our office.  Photo Roland Wicksteed
We were able to study these bees really closely, from the comfort of a toilet seat, and watch them as they flew out of the nest and up towards the tree canopy near by.  The bees always followed the same route to and from the nest, heading off towards a good food source.
A large gap under the roof gave the tree bumblebees a warm and dry place to build a nest and form a colony.
A tree bumblebee seen returning to the nest, pollen sacks fully laden.
Tree bumblebees seem to like bird nestboxes for their colonies in other parts of the country, which to the bees is a close match to that of a nice dry cavity in a tree - exactly what a bird box is trying to replicate.
Now that our bee-senses were tuned in to the activites of these beautiful creatures we looked around for more species.  The flowers around our office were bowing under the weight of bees, and other insects trying to mimic them to avoid being eaten.
A bee? No in fact a hover fly
We also saw bees that on first glance looked like flies because they lacked the bright colours used by bees to warn off anything that might think they were a tasty snack.
A bee? or a fly? Answers on a postcard please!

What can you do to help bumblebees?

1. Plant native wildflowers in your garden
2. Leave plants such as brambles alone until they've finished flowering
3. Think very carefully before using herbicides, pesticides & fungicides.

Ben Knipe
Woodland Ranger